Express Shipping
Orders before 2pm, ship today
Something a bit different from us this week. We have always wanted to make tool storage and organisation as easy and accessible as we can. And so, our ready-made toolbox foam inserts were born. And boy have they been popular!
But what if you have a tool storage box that isn’t currently in our range of inserts and you still want to get your tools organised? Better still, you have tool storage ideas and want to use or upcycle a quirky box, retro case, container or chest? If you need tool storage ideas and don’t know where to start, this will help!
You asked us to demonstrate how you can go about creating a template for any box or container. So here’s how you can get your own custom insert for your own tool storage ideas.

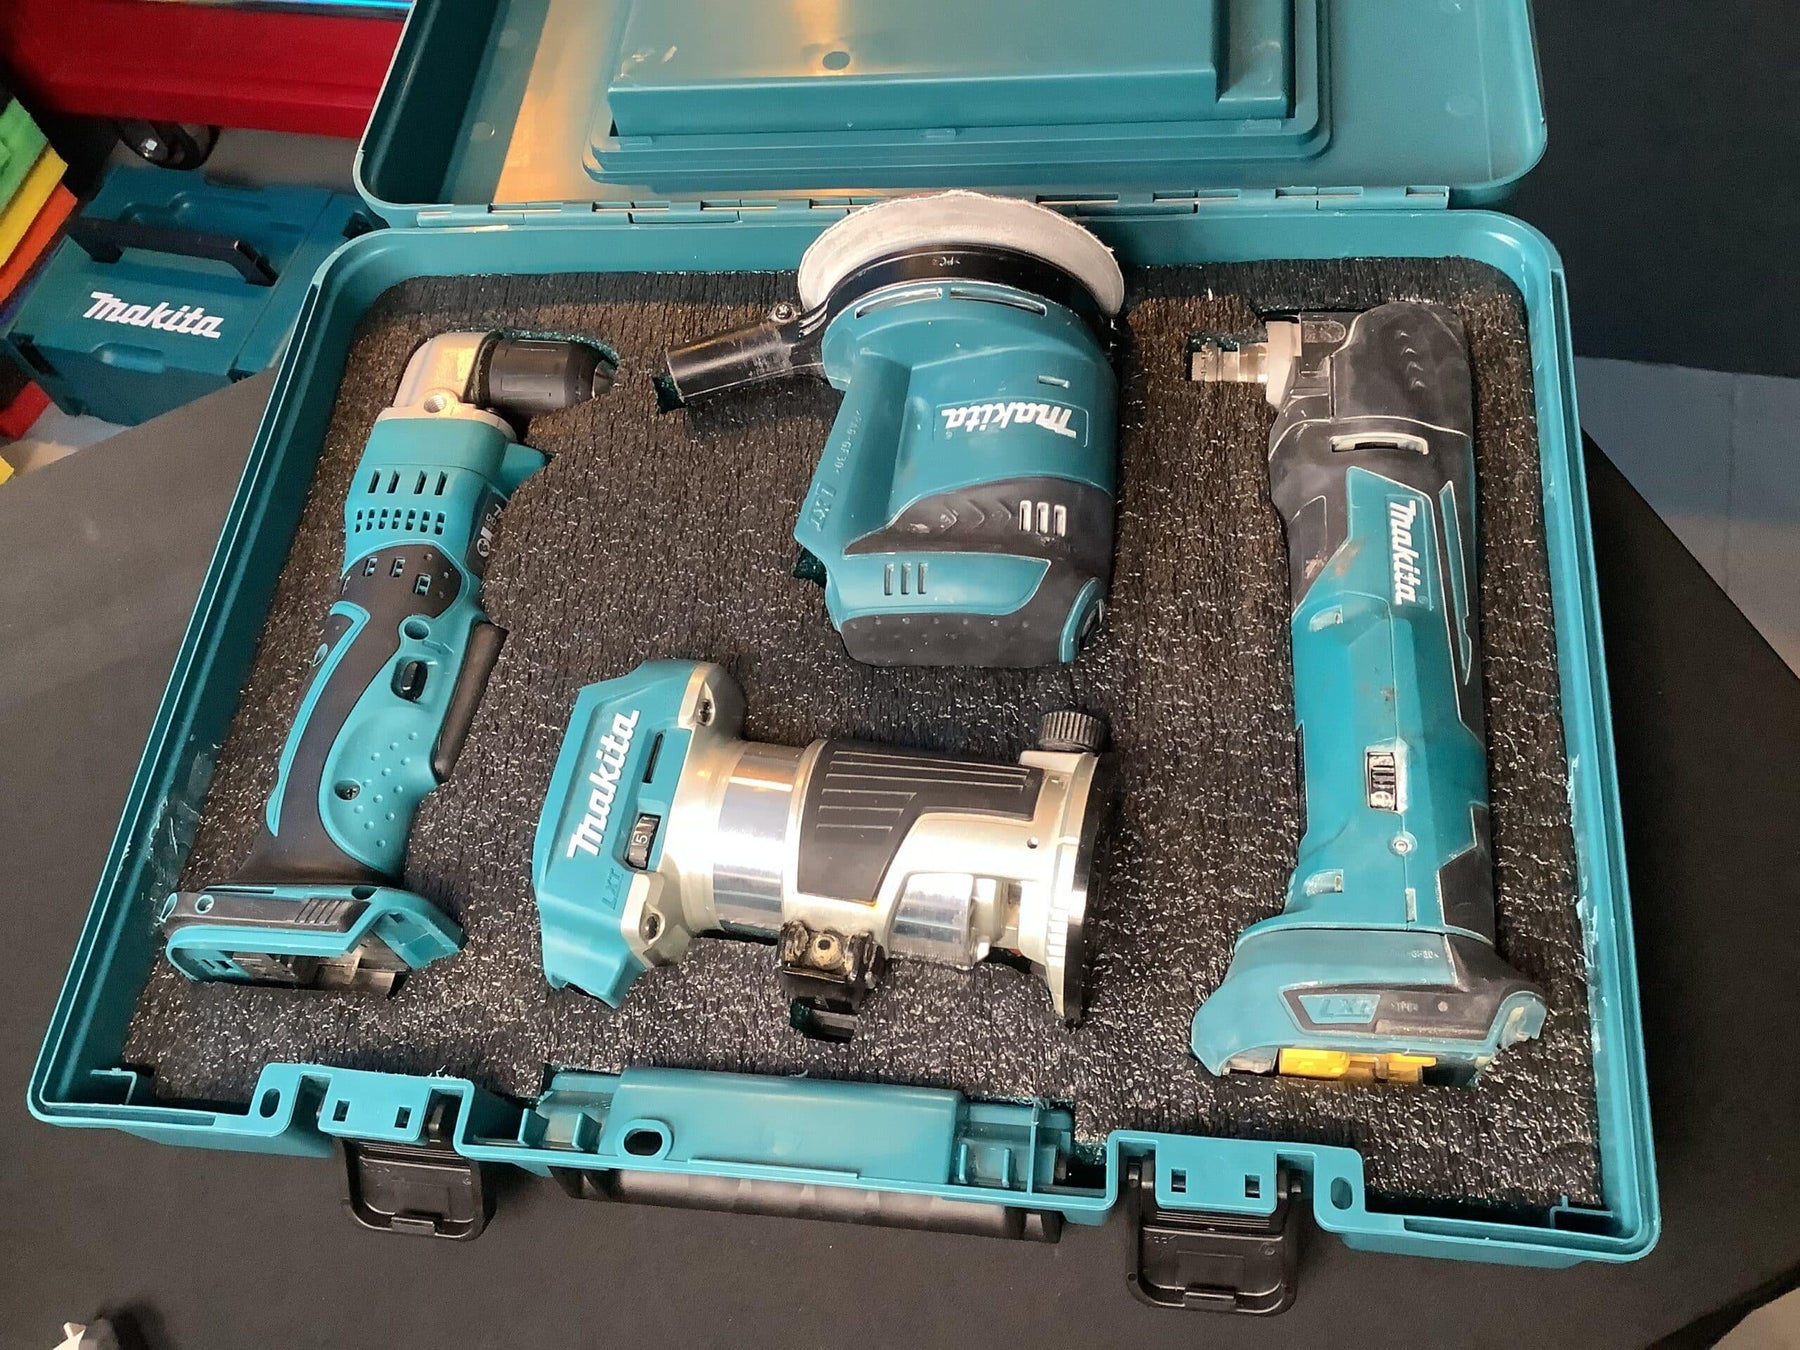
For our demo, we decided to use an old Makita briefcase type box, or power tool case. These come with a lot of the Makita Combi kits so quite a few of you may have these knocking around. Often the case is left unused as the layout isn’t particularly friendly or useable which is a shame. We love to work as sustainably as possible, and like you we hate waste. So this will be a great project for us to upycle something we mightn’t otherwise be able to make use of. We hope we inspire you to create tool storage ideas using an otherwise redundant bit of kit!
The feature that makes this case a bit inflexible are the plastic ribs on the base of the unit. They do serve a purpose in giving it some structure. But the design of the box means it’s still going to be fairly rigid, even when we take these partitions away. Especially so once we have some foam fixed in the base in it’s place. So first job is to use our multi-tool to remove the unwanted plastic. It only took us a few minutes and left us with the perfect blank canvas into which to fit a foam sheet.
Once that’s done, it’s time to map out the shape of the base of the container ready for the insert. This is what we will use to create the foam from. And all you need for this part is some paper and tape!
Initially just fill up the base of the case with paper wherever you can get a flat / straight edge. Then it’s time to address the more pernickety bits, the little recesses where the catches are etc. Do that by cutting the paper down to size, filling the gaps with it and sticking them down so they don’t move. It’s like paper crafting but it’s a really effective way to create what you need.
Eventually you will be left with a full paper template. On ours, we left out two corners where we were going to have to create a radius profile. To do that we use our radius gauge tool to measure and accurately the size needed. These are available to buy very cheaply in our online store if you need them.

Next it’s time to take our selected piece of foam which we want to customise to fit. Because this is a Makita box we thought it would be nice to use our new teal foam to compliment it. As we are fitting power tools we have gone for 50mm depth. But there’s a range of colours and depths that you can choose from too.

Taping the paper template to the foam makes sure it doesn’t move as we trace cut around the outline. We create the trace cut using the blade that comes in our cutting kits. Once you are happy you have a nice outline you can remove the paper. Do keep it though in case you need it again.
Now we have the basis of our shape cut into the foam. So it’s time to carefully follow around that line and cut down deeper to create our insert. Don’t rush this bit, take your time to make sure you really follow the initial cut accurately. Sometimes with a shallow cut, there’s a tendency for the blade to want to stray from the line. So focus on replicating the route of the initial cuts as accurately as you can.
Once you have the base shape for your case all cut out, think about any radiuses or indentations in the case. These will need more customisation to the bottom of the foam to fit. For us, we have a radius along the front edge so we used the knife to shave away the square corner on the base of the foam so it will sit neatly. There were also radiuses on two of the corners which we needed to cut out. For this, we used our radius stencil which is available as part of our stencil set.
One happy with the tweaks, it’s always worth doing a test fit. Ensure the foam insert is snug and flat before you do any more work on it. Then on to the all important planning stage.
Always take into consideration any encroachment on space from sections and indentations in the lid of the box. For ours there is a big tray within the lid which protrudes into our available space. That will definitely limit the size of items we can store in that section.
So when planning our layout we ensure that the items that stand most proud from the foam are located around the outer edge. For us that’s where there’s more space, so we will still be able to close the lid. Of course another option would be to cut the ribs off the lid in the same way we did the base. But hopefully it doesn’t come to that for most of you.
We wanted to use this otherwise redundant case to house the items that are handy for us to have in the van but that we perhaps don’t use day to day. We plan to store in it: a multi-tool, an angle drill, a palm sander and a palm router which are part of the Makita 18v range. These fit together in our case perfectly. Even for less used items it’s great to know where they are and that they’re protected like this.

This just shows that these kind of cases that you often get free in tool bundles can be easily customised to be a useful tool storage case. However ambitious your tool storage ideas are, this can help you fit a foam organiser to your container. So next time you buy a tool and transfer it into your usual kit, maybe give some thought as to how you can repurpose the container to make it a useful rather than throwaway item… lets give these things a second life!
{"one"=>"Select 2 or 3 items to compare", "other"=>"{{ count }} of 3 items selected"}