Fast Worldwide Shipping*
Daily order cutoff at 2pm

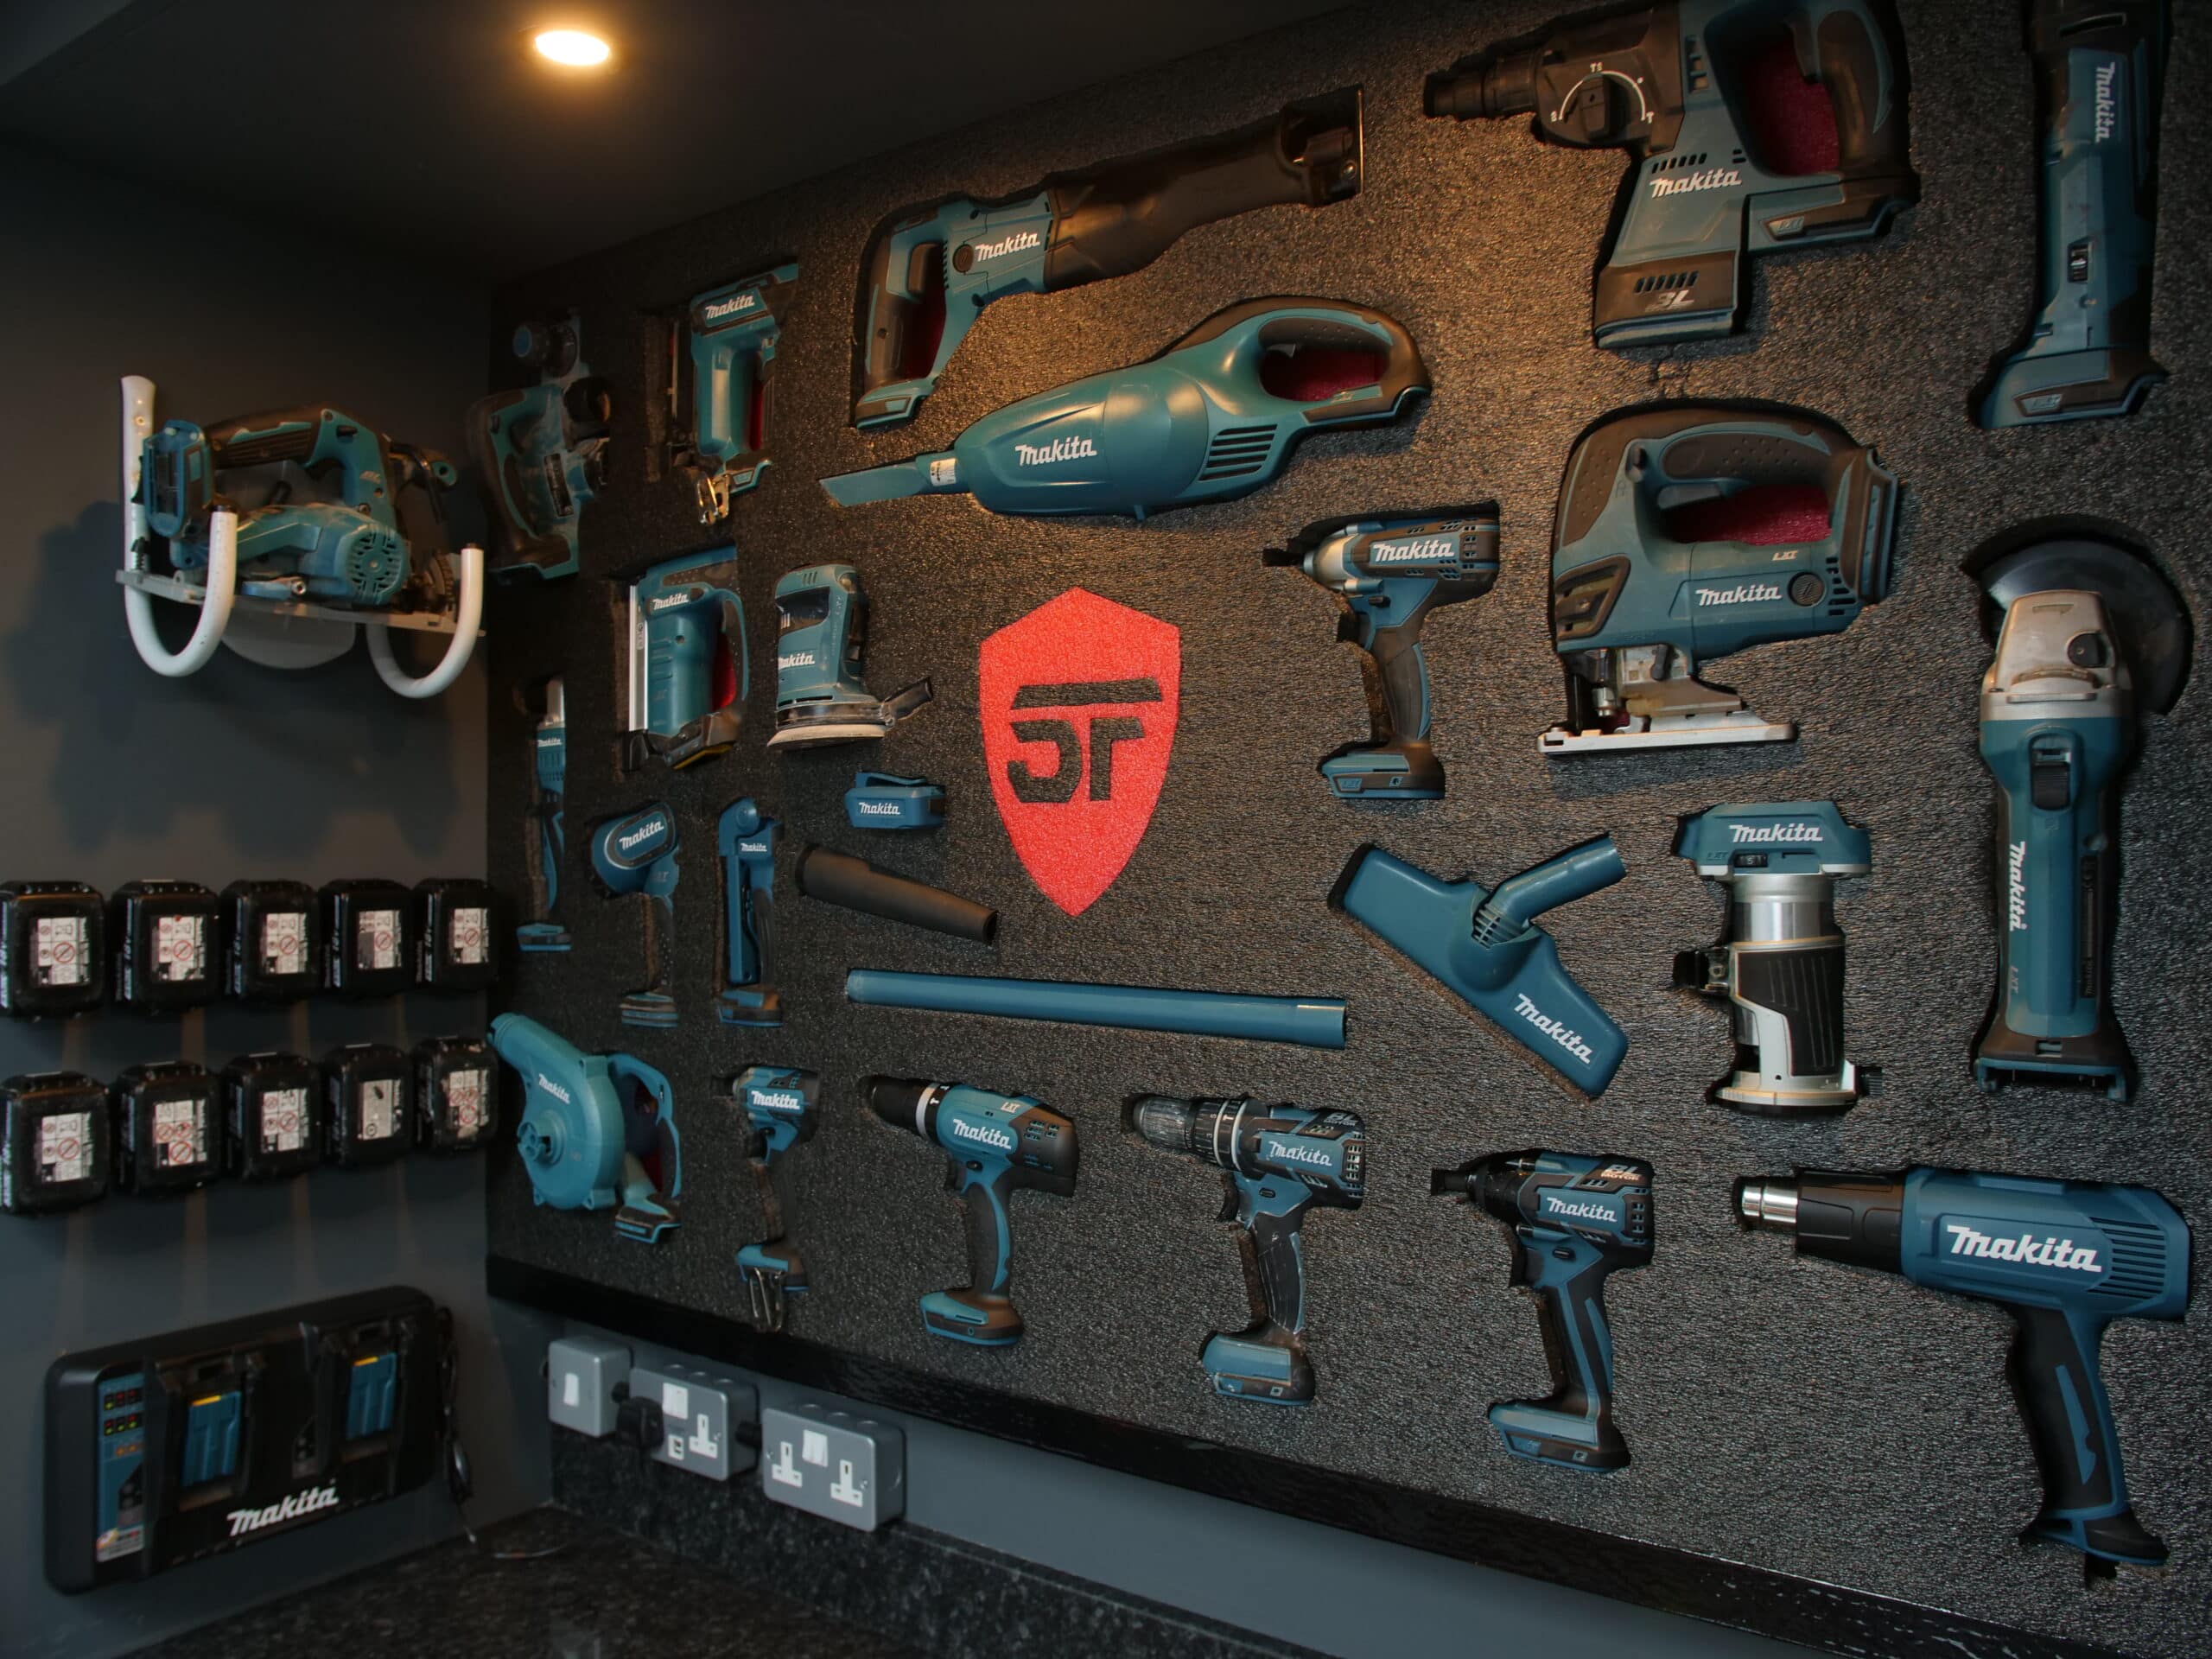
We’ve revisited our original Makita tool storage system, known as the infamous power tool wall! We’ve been working on our studio / work-shop for about a year and it’s almost finished. Of course our beloved Makita tool storage had to form a part of this as we found the original a huge improvement versus the old Makita tool storage boxes we had. So it’s no accident that we ended up with two bays which are perfect for storage. So we are adding two new foam walls, one of which dedicated to our Makita power tool storage. We placed spotlights above each bay which set off the tool-wall and will give it an epic man-cave vibe when it’s done.

We know many people took on this DIY project and replicated the first Makita tool storage wall in their own garage or workshop as we had lots of interest and questions about it. People were keen to find a workable solution to the traditional Makita tool storage boxes. No wonder, it’s a storage solution that is time-saving as well as space-saving. And it looks super cool too!
People asked how our Makita tool organiser solution worked. How it held up over time, and how we stop powertools falling out. The original wall we created has been going for 2 years now and many of the tools in there are used regularly. But, it was made from Shadow Foam Original which was our first, but now old and discontinued polyurethane grade of foam. We can now see a few small signs of use, a couple of marks here and there. But the day to day use of taking tools in and out hasn’t strained or damaged the foam at all, so it’s held up really well for it’s age. Certainly no more signs of wear than you might expect to see in frequently used Makita tool storage boxes.

Our new grade of foam which was originally called Easy Peel but is now just known ad Shadow Foam is polyethylene, so it’s more durable than the old Original. We still have a broad range of colours, but it’s a more sustainable manufacturing process. That means we can recycle any off cuts and waste now too. It’s more resilient and robust offering better protection when mounting tools in it. So for version two of the wall we wanted to us this, also changing the layout of the wall, adding a battery station charger and battery mount to our Makita power tool storage wall. Additionally we needed to add new tools to our growing collection. Finally needed to change the logo from our old one to a newer version. makita tool storage system
Our two bays are around 1.5m wide, as the maximum sheet size that we can do is two meters by one meter we will go for the full 1.5m width. Then, the 1.0m depth which positions it nicely over the sockets beneath.
First step in creating the tool storage wall was installing a bottom rail which will hold the foam sheet on the wall and create a secure fit. We considered painting the wood the same shade as the wall but as we had some black gloss vinyl and thought it would be a cool idea to vinyl wrap it. This means we can then attach it to the wall and then re-cover the drill holes and screws to make a tidy, effective rail with no visible fixings. Another neat idea for those of you who love storage hacks! This worked really well, and a tip if you try this at home is to use heat to make it stick even better.
We wanted dual colour so you can easily see when an item is missing, so opted for red and black. We didn’t have any large panels in stock of red, so instead used smaller 1200 x 550 sheets. Piecing them together behind the larger front panel created the same effect.

Whenever you’re shadowfoaming, planning is all important. Planning the layout of your Makita tool storage wall is one of the most important steps. Maybe take some inspiration from the layout in your existing Makita tool storage boxes in terms of what’s used most, and what you need to hand. Make sure you have all the tools you want in the wall together, and have plenty of space. A consideration for us to make it look professional was getting our logo included. For practical reasons we also made sure the tools we use most often are lower down and easier to access. We maintained a 40-50 mm gap on the edge, orientating all the triggers so they faced the same way. These little details can make the finished result look much neater. Big tip – when you get to the stage where you’re happy with the layout, take a picture!
Next the logo – we made sure it was in the centre before cutting. We’re doing it by hand so don’t expect to get the same finish as machining. But we wanted to demonstrate that you can achieve a good finish doing it by hand. So whether it’s to store kit you use as a hobby or for trades you can achieve that personalisation on your Makita tool storage system.
When cutting, you can’t often see where you’ve cut unless you press down on the foam. This makes any mistakes easy to hide! We used our Fantastic Elastic glue for fixing the lettering in place. This is a brilliant item to have when working with foam. If you make a mistake or want to change the position of something, it lets you glue without drying hard. This is available to buy from us in our cutting kits. Also in the kits are our cutting gloves which we recommend you wear to protect yourself when cutting. makita tool storage system
When you’re cutting tools into the foam we recommend you trace cut around it. Keep the blade at 90 degrees perpendicular to the foam. Once done, take the item away then go back and cut down to the desired depth. When you’ve completed the cutting, take off your gloves to make the peeling easier. Push your finger down one end then pull back and peel away a few layers at a time. Repeat until you reach the desired depth.

Another idea is to keep the piece of foam that you’ve pulled out; for a couple of reasons. First, if you’re creating a hole for a shallower piece of kit, then you can use it as a template to cut around, making a contrasting insert. Second if you need to spray glue the reverse to mount the wall, you can re-insert the shapes into the holes to stop your glue going inside them.
One of the challenges we had is an item which isn’t part of the 18v range. Our heat gun has a 3m cable on it which if left loose would spoil the look of the of the wall. We considered that we could keep this in it’s original Makita power tool storage box, but then we had an idea! We overcame the cable issue by making a cavity behind the foam to loop the cable into, hiding it. All we had to do was flip the foam over and working from the back, create the cavity. We free hand cut a crescent shape, and left a thick piece of foam at the front to stop it looking distorted.
In terms of securing the wall, we didn’t want to glue it to the wall in case we ever take it down. A better solution for us was to use multiple screws across the back sheet where they won’t be seen. We then glued the front piece to the back piece. One consideration is that we’ve three really heavy items in one area. To counter that, we added extra screws there on the front sheet. Tip: by cutting a small flap into the foam this will hide the screw heads when it flaps back down.
Next for mounting the charger to the wall. There are many ways to achieve this. We found a way of invisible mounting from behind as we could access from the back. For the stealth mounts we positioned them above the battery chargers. We used a spirit level to make sure they were even and spaced evenly.
We wanted a separate shelf for our circular saw. But then we found a pair of brackets which work perfectly to create a cradle. When positioning, we ensured they don’t obstruct us when taking anything out of the wall.
We’re buzzing with how this new version of the Makita wall turned out. We’ve made huge improvements versus the first version, but really welcome feedback. How do you think we can make additional improvements to our Makita tool storage system in future…?
{"one"=>"Select 2 or 3 items to compare", "other"=>"{{ count }} of 3 items selected"}