Fast Worldwide Shipping*
Daily order cutoff at 2pm

This week Jonathan was taking on a bit of something different as a project for his brother-in-law. Evan is from Mr Autos, Northwich and has a new drone. So we know it’s one that many drone fans out there will appreciate as we see more and more people getting their drone storage organised using Shadow Foam. So this week, we’re taking his DJI Mini 3 Pro Drone, organising it and protecting it. And we’re putting it in the ultimate in portable carrying devices… a backpack! See how it was done, and how we got on with it here.
In a nutshell… weight. At 1g less than 250g this means that it’s the largest drone you can fly without a license or training. It’s small and foldable too which is great for portability. But in this case, small is still pretty powerful and has some upgraded safety features which is obviously really important.
The camera on the DJI Mini 3 Pro Drone is supported by a 3-axis gimbal that keeps your footage rock-steady. You can flip the camera 90° for True Vertical Shooting – ready to go on socials without cropping. APAS 4.0 spots and avoids obstacles to keep the drone safe, so you can focus on getting the shot. And it runs with up to 34 minutes of flight time.
It’s of course down to individual preference, but when you have a high value bit of kit, it definitely pays to protect it in some sort of case. At the very least it keeps all you kit and accessories together in one place.
The Drone case that the unit came with would be fine for many – it’s super small and light. But what it doesn’t do is flag if anything is missing before you pack up and leave site. By introducing Shadow Foam into your drone storage, this means you can see at a quick glance if you have all your kit. It also protects it while you’re on the move.
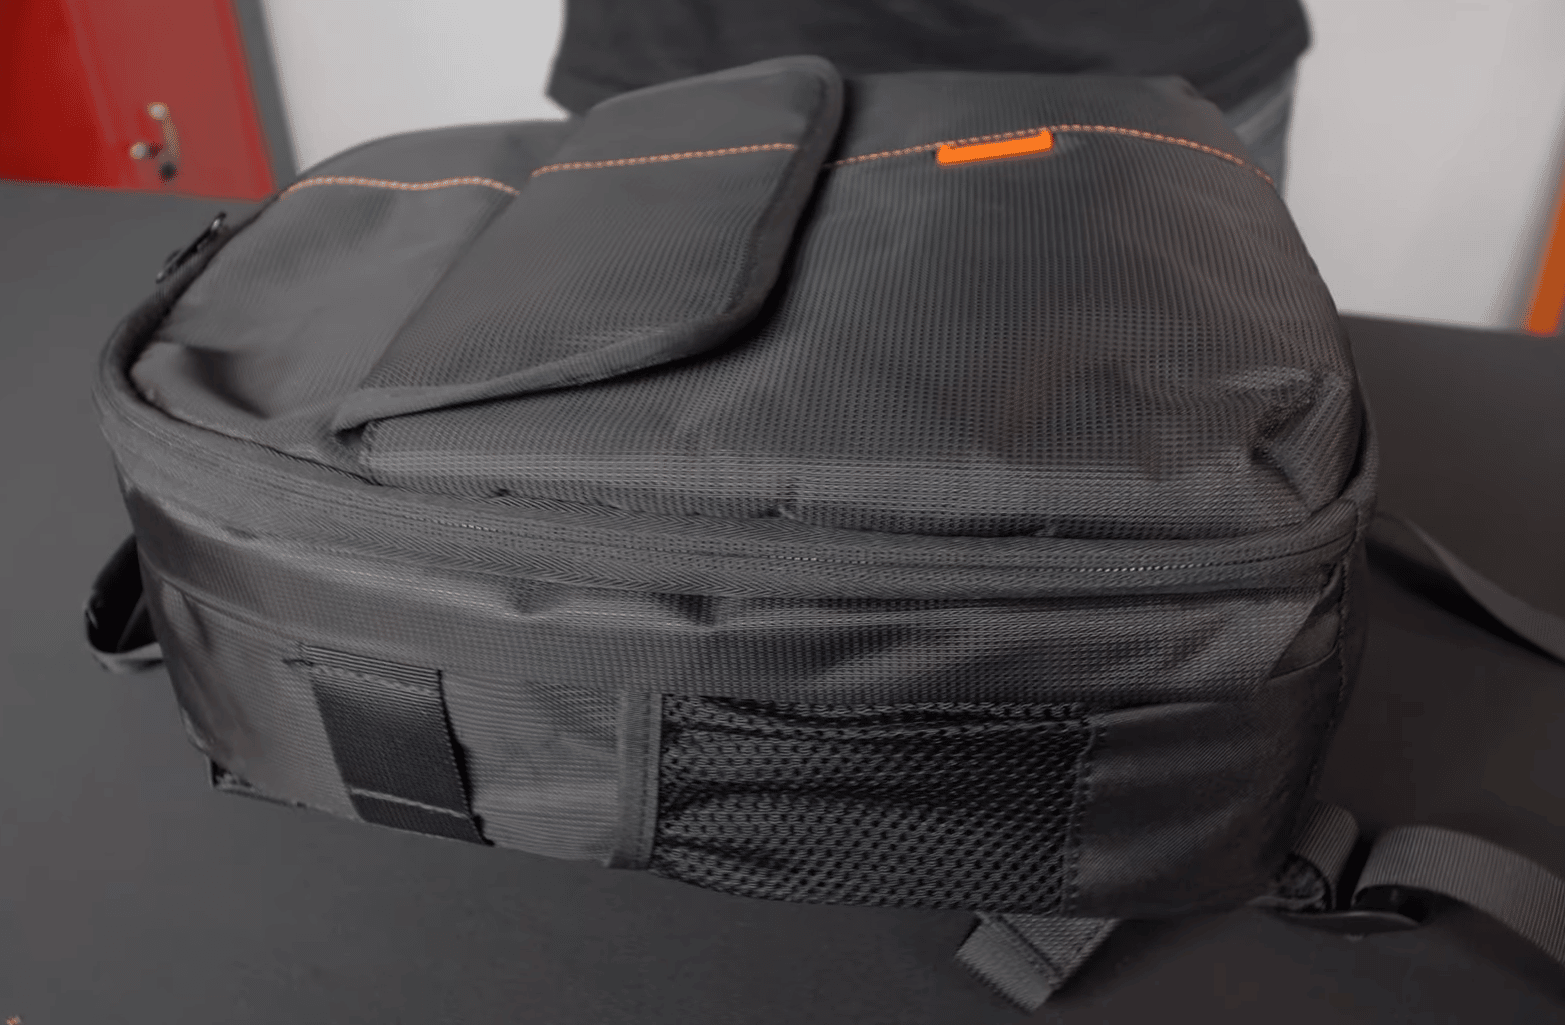
For us we have gone for the ultimate in hands-free portability. The trusty backpack. We’ve done a few backpack projects recently including a DeWalt tool backpack and our own audio kit backpack. And it’s no accident we keep coming back to these. They keeps your hands free for other tasks (in this case flying our drone!), and it’s just about the perfect size for our kit.
We had the perfect, small photography backpack that we could re-purpose for this drone case. By luck, it was in the owners favourite colours, Black and Orange. Given it’s intended use, it already has a little strength and padding to it. But by using Shadow Foam we know we can bring even more structure to it so this will be perfect for the task.
We’ve demonstrated before some of the techniques you can use to create your own custom fit insert at home with the most basic of tools. Soft-sided cases and bags like this backpack do make it a little more challenging. But with a little patience you can easily get a custom fit foam insert for pretty much any bag or case.
The technique we’ve chosen to use here is by using the opening front zipped panel as a template to base the shape on. This will give us something really close to the size and shape we need to fit the bag. Then, from there, we can just refine as needed. We are using a complimentary piece of Orange 70mm deep foam. Ours is just an offcut from another project, and you too may have offcuts laying around. Otherwise, our custom foam service is really handy when you know you need a certain size of foam as we will manufacture it to size for you.
Equipped, as always, with our trusty Shadow Foam Cutting Kit (and wearing the all important safety gloves) we get started. We apply our usual cutting technique to create the shape profile for the insert by trace cutting around the outline of the front of the case. From there, we can remove the case, and using our Shadow Foam scalpel, go back around the cut until we cut all the way through. Drone case Drone storage
Once you have the basic shape cut out – try it for size. Then trim and refine it until it fits the case perfectly. For us, that also involved cutting a radius around the inside edge of it. This allows for the reinforced seams on the inside of the case.

Next is the real fun bit… planning how you want your gear to be laid out. We always say in our Shadowfoaming guides, that planning is the most important bit of the process. So ensure you’re totally happy with your layout before you begin cutting.
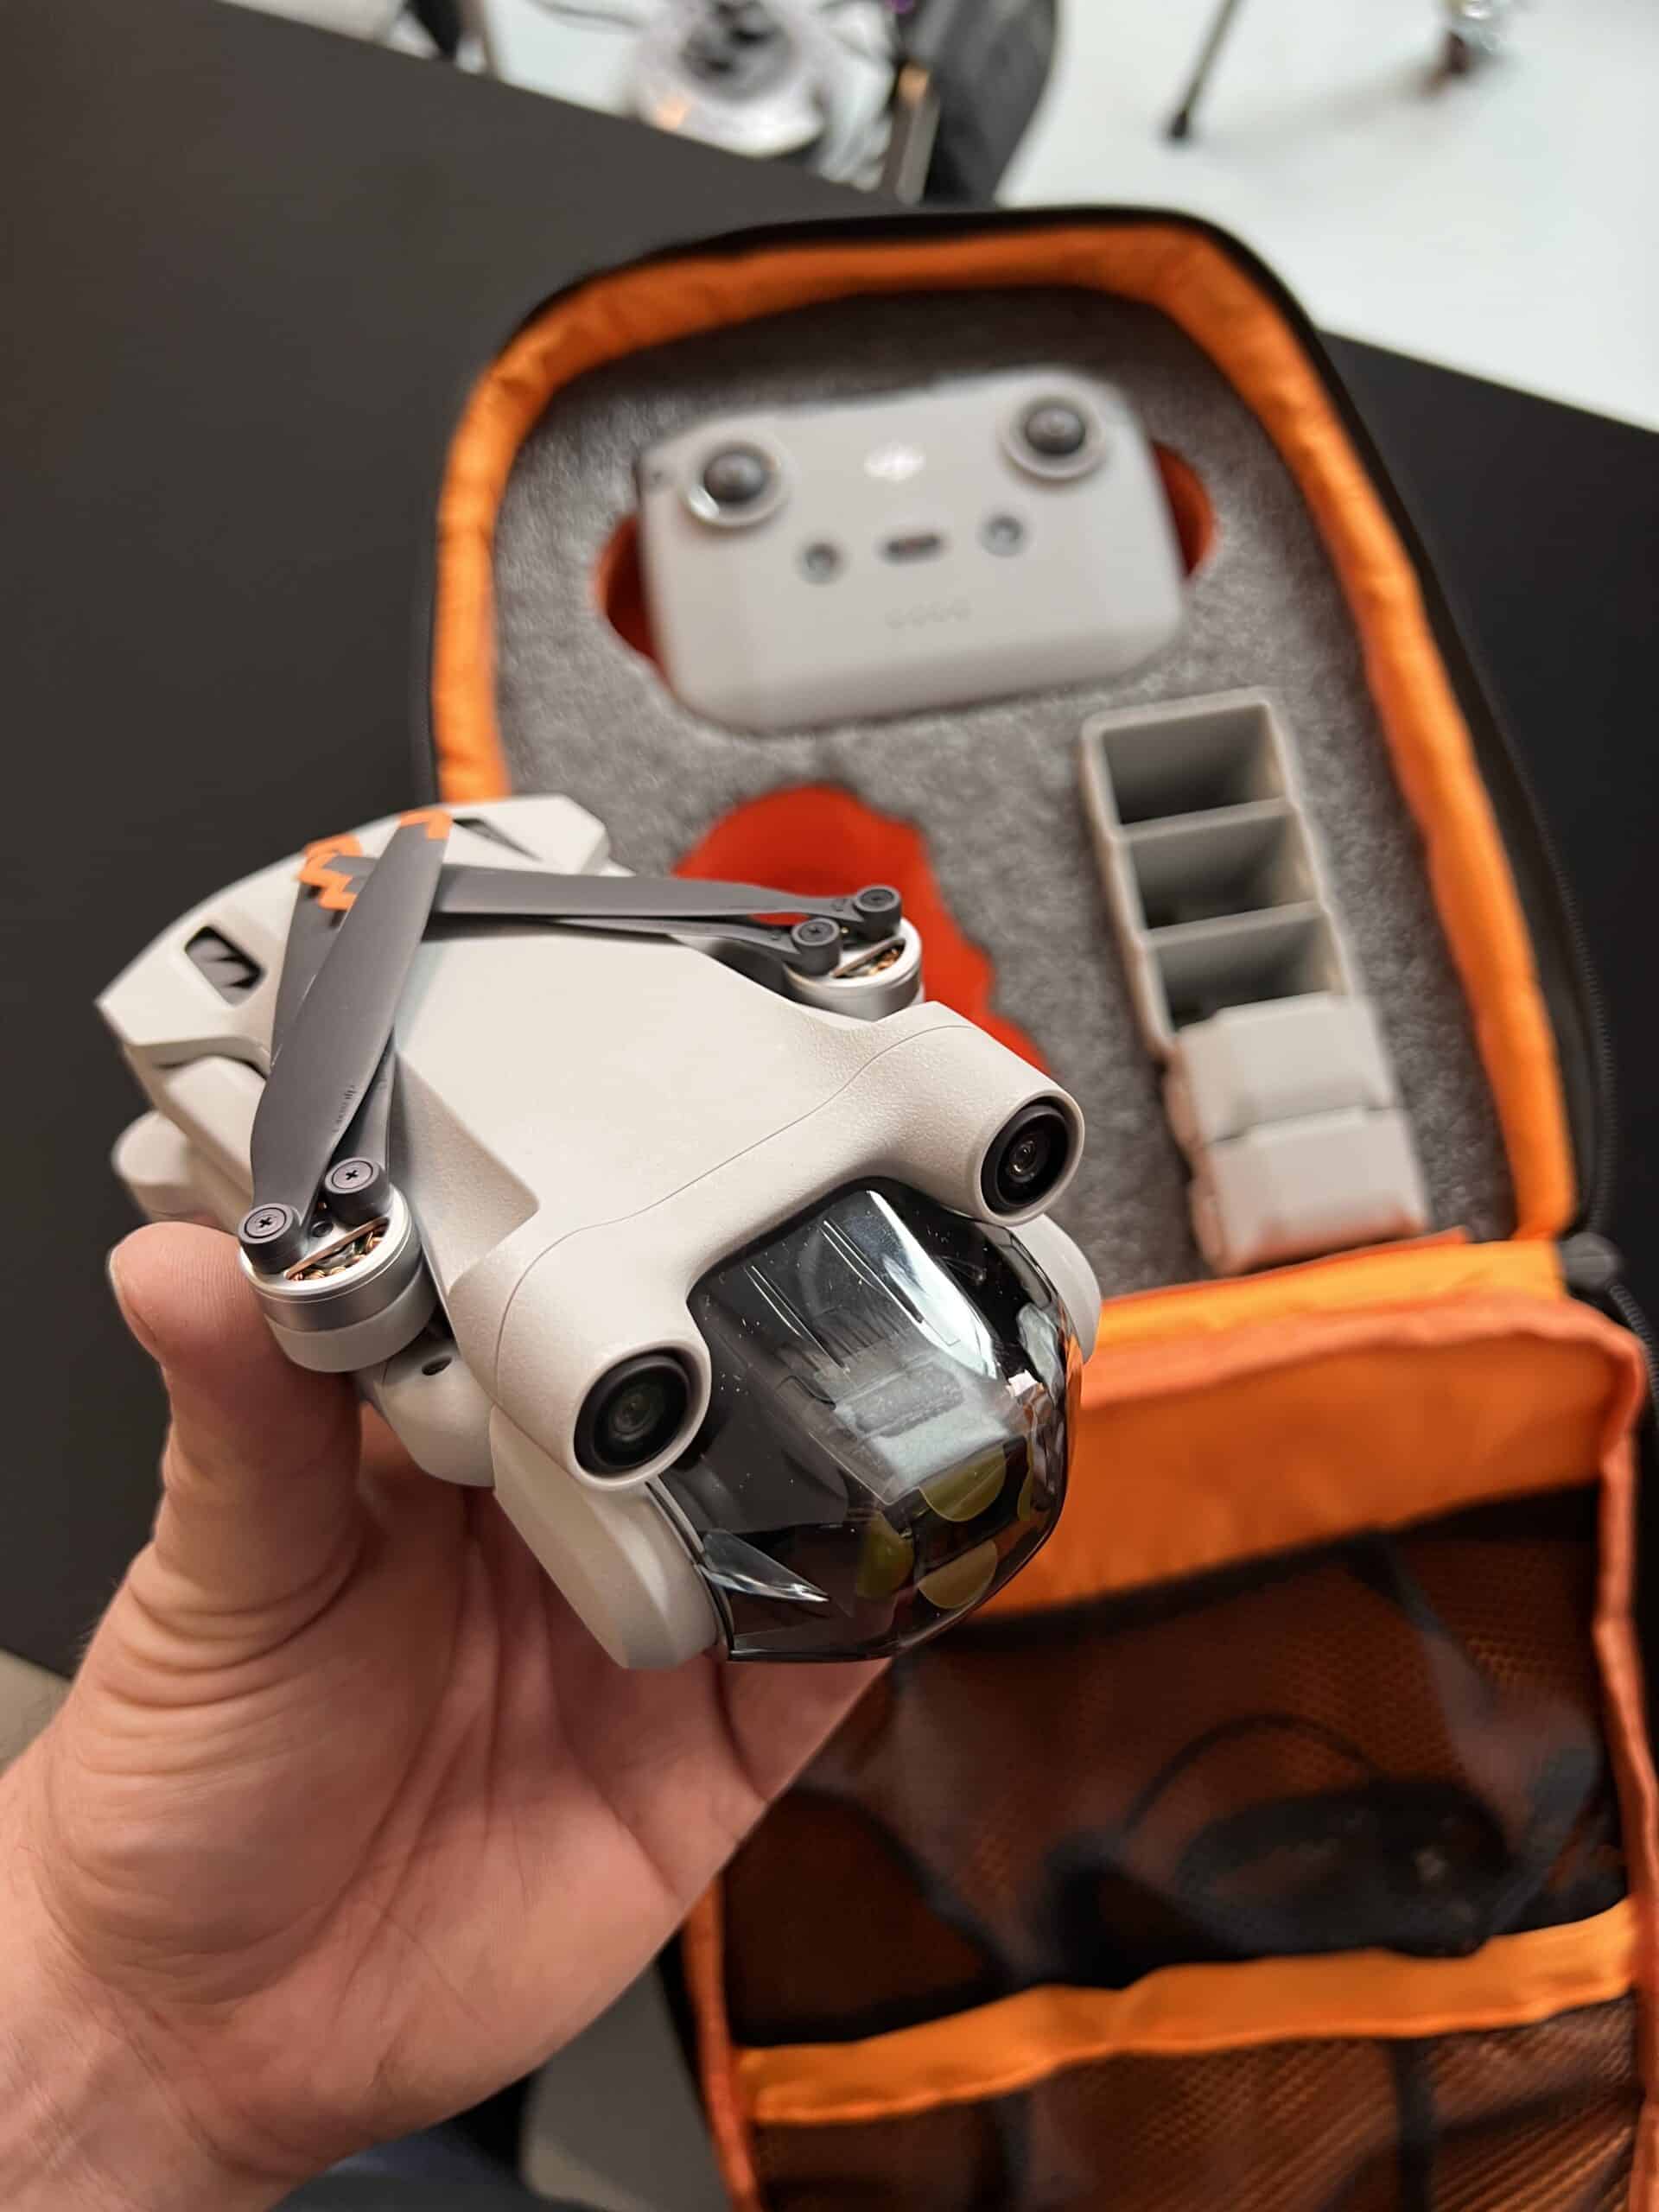
The same cutting technique as before applies. As we trace cut around each item in turn, before going back in and cutting down to the desired depth. From there, it’s time to peel. For this we always recommend you watch our “how to” guides to equip yourself with the best techniques for doing this. We have been a bit crafty with space on this project. As we have a deep sheet of foam here, it’s allowed us to double-layer. So beneath the RC handheld controller we have cut down an additional little section to store the replacement props and tools.
As an added feature to make it more practical for use, we also used our Shadow Foam stencil set to add finger pulls. This will make it easier to get the items out of the foam, and looks pretty cool too.
We also wanted to future-proof it and allow space for additional batteries that Evan would be adding to the collection. We achieved this by cutting in the existing batteries and the battery charger case separately. This means ultimately there’d be space for 5 batteries in there, giving an overall flying time of nearly 3 hours.
Evan was really pleased with his case, he said,
“I explained that I wanted the drone foamed out within a backpack that housed everything I would need to be able to fly the drone with complete ease and be able to pack up just as quickly. Jona instantly had an idea and said to bring the drone down to the unit. Within a short while I had it back and when he showed me I was completely blown away!
I can’t believe how durable and workable the foam is. Everything I asked for and more was accommodated for and that is priceless. I feel super assured that my pride and joy is safe and secure within a backpack with easy removal for flight and all at a excellent price!“
We’re so happy to have been able to help you Evan. Happy flying!

{"one"=>"Select 2 or 3 items to compare", "other"=>"{{ count }} of 3 items selected"}