Fast Worldwide Shipping*
Daily order cutoff at 2pm


We wanted to show you how easy it is to get any Makita toolbox organised. To start with we’re focusing on the Makpac using our Makita Makpac inserts, and we’ll move on to their cantilever toolbox which goes with it. We’re obviously going to be using our Shadow Foam material as always. For the Makita range we’ve now got a range of seven colours with which to work: Black, Red, Blue, Green, Orange, Yellow and our brand new colour Teal. This complementary colour was released into our Makita Makpac foam insert range at the end of 2021 and goes with the boxes perfectly.
The inserts are already cut and shaped to fit into your Makita box. There’s also a choice of 30mm or 50m depth of foam, to suit whatever you want to fit in there.
If you’ve seen our work before you’ll know that we have a lot of Makita power tools. So over time, we’ve amassed quite a lot of these boxes! You’ll often find them bundled in with the tools when you first buy them. Some come empty already but others will have a plastic tray in them. These trays don’t give you any flexibility with how you want to lay things out. A big factor for us though is that they don’t typically last very long either. So by upgrading to one of our Shadow Foam inserts, you get longevity along with a more efficient layout. And, most importantly, the added protection that the foam gives your tools.
With the inserts being pre-made for the case, they fit straight down into the bottom and sit nice and flush. This is the perfect blank canvas for you to work with. First just start with a bit of planning to come up with a layout that works for you. Our product is adaptable so you can create any layout you want. Just set the tools out and move them around until you are happy with them.
To demonstrate, we are going to work with our Jigsaw. This is a pretty common item that people keep in their Makpacs. For practicality we also want to include batteries and blades in there too. Playing around with the layout shows that by turning the tool sideways we can fit more into the case. This gives us the opportunity to include more batteries which is always handy.
Once you are happy with the layout… take a photograph of it! Not as important for just a couple of items, like this, But when you are adding quite a few tools it’s definitely worth it to have that visual record of your layout. Now we have a visual reference and can move the tools away to allow us to work more comfortably.
Safety first! When you start cutting we very much recommend you wear a pair of anti-cut gloves. You can get these in our cutting kits. You definitely want to wear these whenever you’re cutting. With the scalpels that we provide it’s an absolute must. Our scalpels are super sharp to make the cutting as efficient as possible for you. They are also on a very thin handle that allows you get very close to the tool. You can of course cut this with any sharp knife you have, but we don’t really recommend that, and it could blunt your blade.
While we’re talking about blunt blades… Please always make sure you work with a sharp blade to prevent tearing and damaging the foam. We give you a free basic cutting pack with all orders over £50 and this contains cutting instructions. A whole range of additional cutting packs and tools are all available to buy on our website very cost-effectively. Check out the range, and make sure you have everything you need to tackle your job.

Once you’re ready to start cutting you pick out one of your items. For something like our pack this it doesn’t really matter where you start. But often you’d start with the biggest item so you can fit the smaller ones around it afterwards. We begin with our Makita jigsaw, making sure we position it least 10mm from the edge all the way around.
So, using the scalpel like a pencil, position it at 90 degrees, or perpendicular to the foam. First, make just a small cut. We aren’t cutting deep initially, just creating a shallow trace cut or outline around the edge of the tool. Once done, we can remove the item and go back around with the blade making this cut a lot deeper. For something like the jigsaw we are working on we can go down to 40mm in this 50mm liner which will make sure that that item is nice and snug. It’s useful to make a visual reference on the side of the blade of the depth you want to cut. Then just go back around cutting down to that level.
Another consideration for this tool is the blade. We chose to remove it for safety and protection in storage, but you may prefer to keep it on. If you wanted to you could of course add a section for the blade too but we haven’t.
Once confident you’ve cut everything you need, just check you have gone all the way around. And then, it’s time to peel! Once your blade is put away, we recommend you remove your gloves to make the peeling a bit easier. Just start at a corner and peel back just one layer to start with. This helps us to see that we’ve got the profile correct. Make sure you use your fingers to push into the layers you want to peel back. If you just pinch an end and pull, it can tear off without cleanly bringing the whole layer with it. This takes a little bit of force, but essentially you are pulling the layers apart as you go along.
The foam has to have this level of firmness. Otherwise if it was too easy to peel back, then the foam could delaminate and fall apart. It has been specifically designed in this way so that we know your Makita Makpac inserts are really going to last you.
When you’ve peeled back all the layers to get you to your desired depth, you can tweak slightly as needed. We had to go a little deeper in a couple of areas where bits of the tool stick out. This just lets you make sure you have a perfect flush fit when it’s positioned into the foam. Then, just test fit to make sure you are happy before moving on to the next item. For us, that’s the batteries. Make sure before you return to cutting that you put your cutting gloves back on! With both the batteries and the jigsaw blades we’ve decided we don’t need to cut in any additional finger pulls. That’s because we can simply grab them for taking in and out. But for you, it’s something you might want to consider for smaller items, or hand tools.
So moving on to the cantilever toolbox. The very nature of these types of toolbox means you need four separate inserts. We do them in a pack, so you know it’s all made to measure and will fit perfectly. It’s worth noting that the larger pieces go in the top sections, and the slightly smaller ones in the bottom.
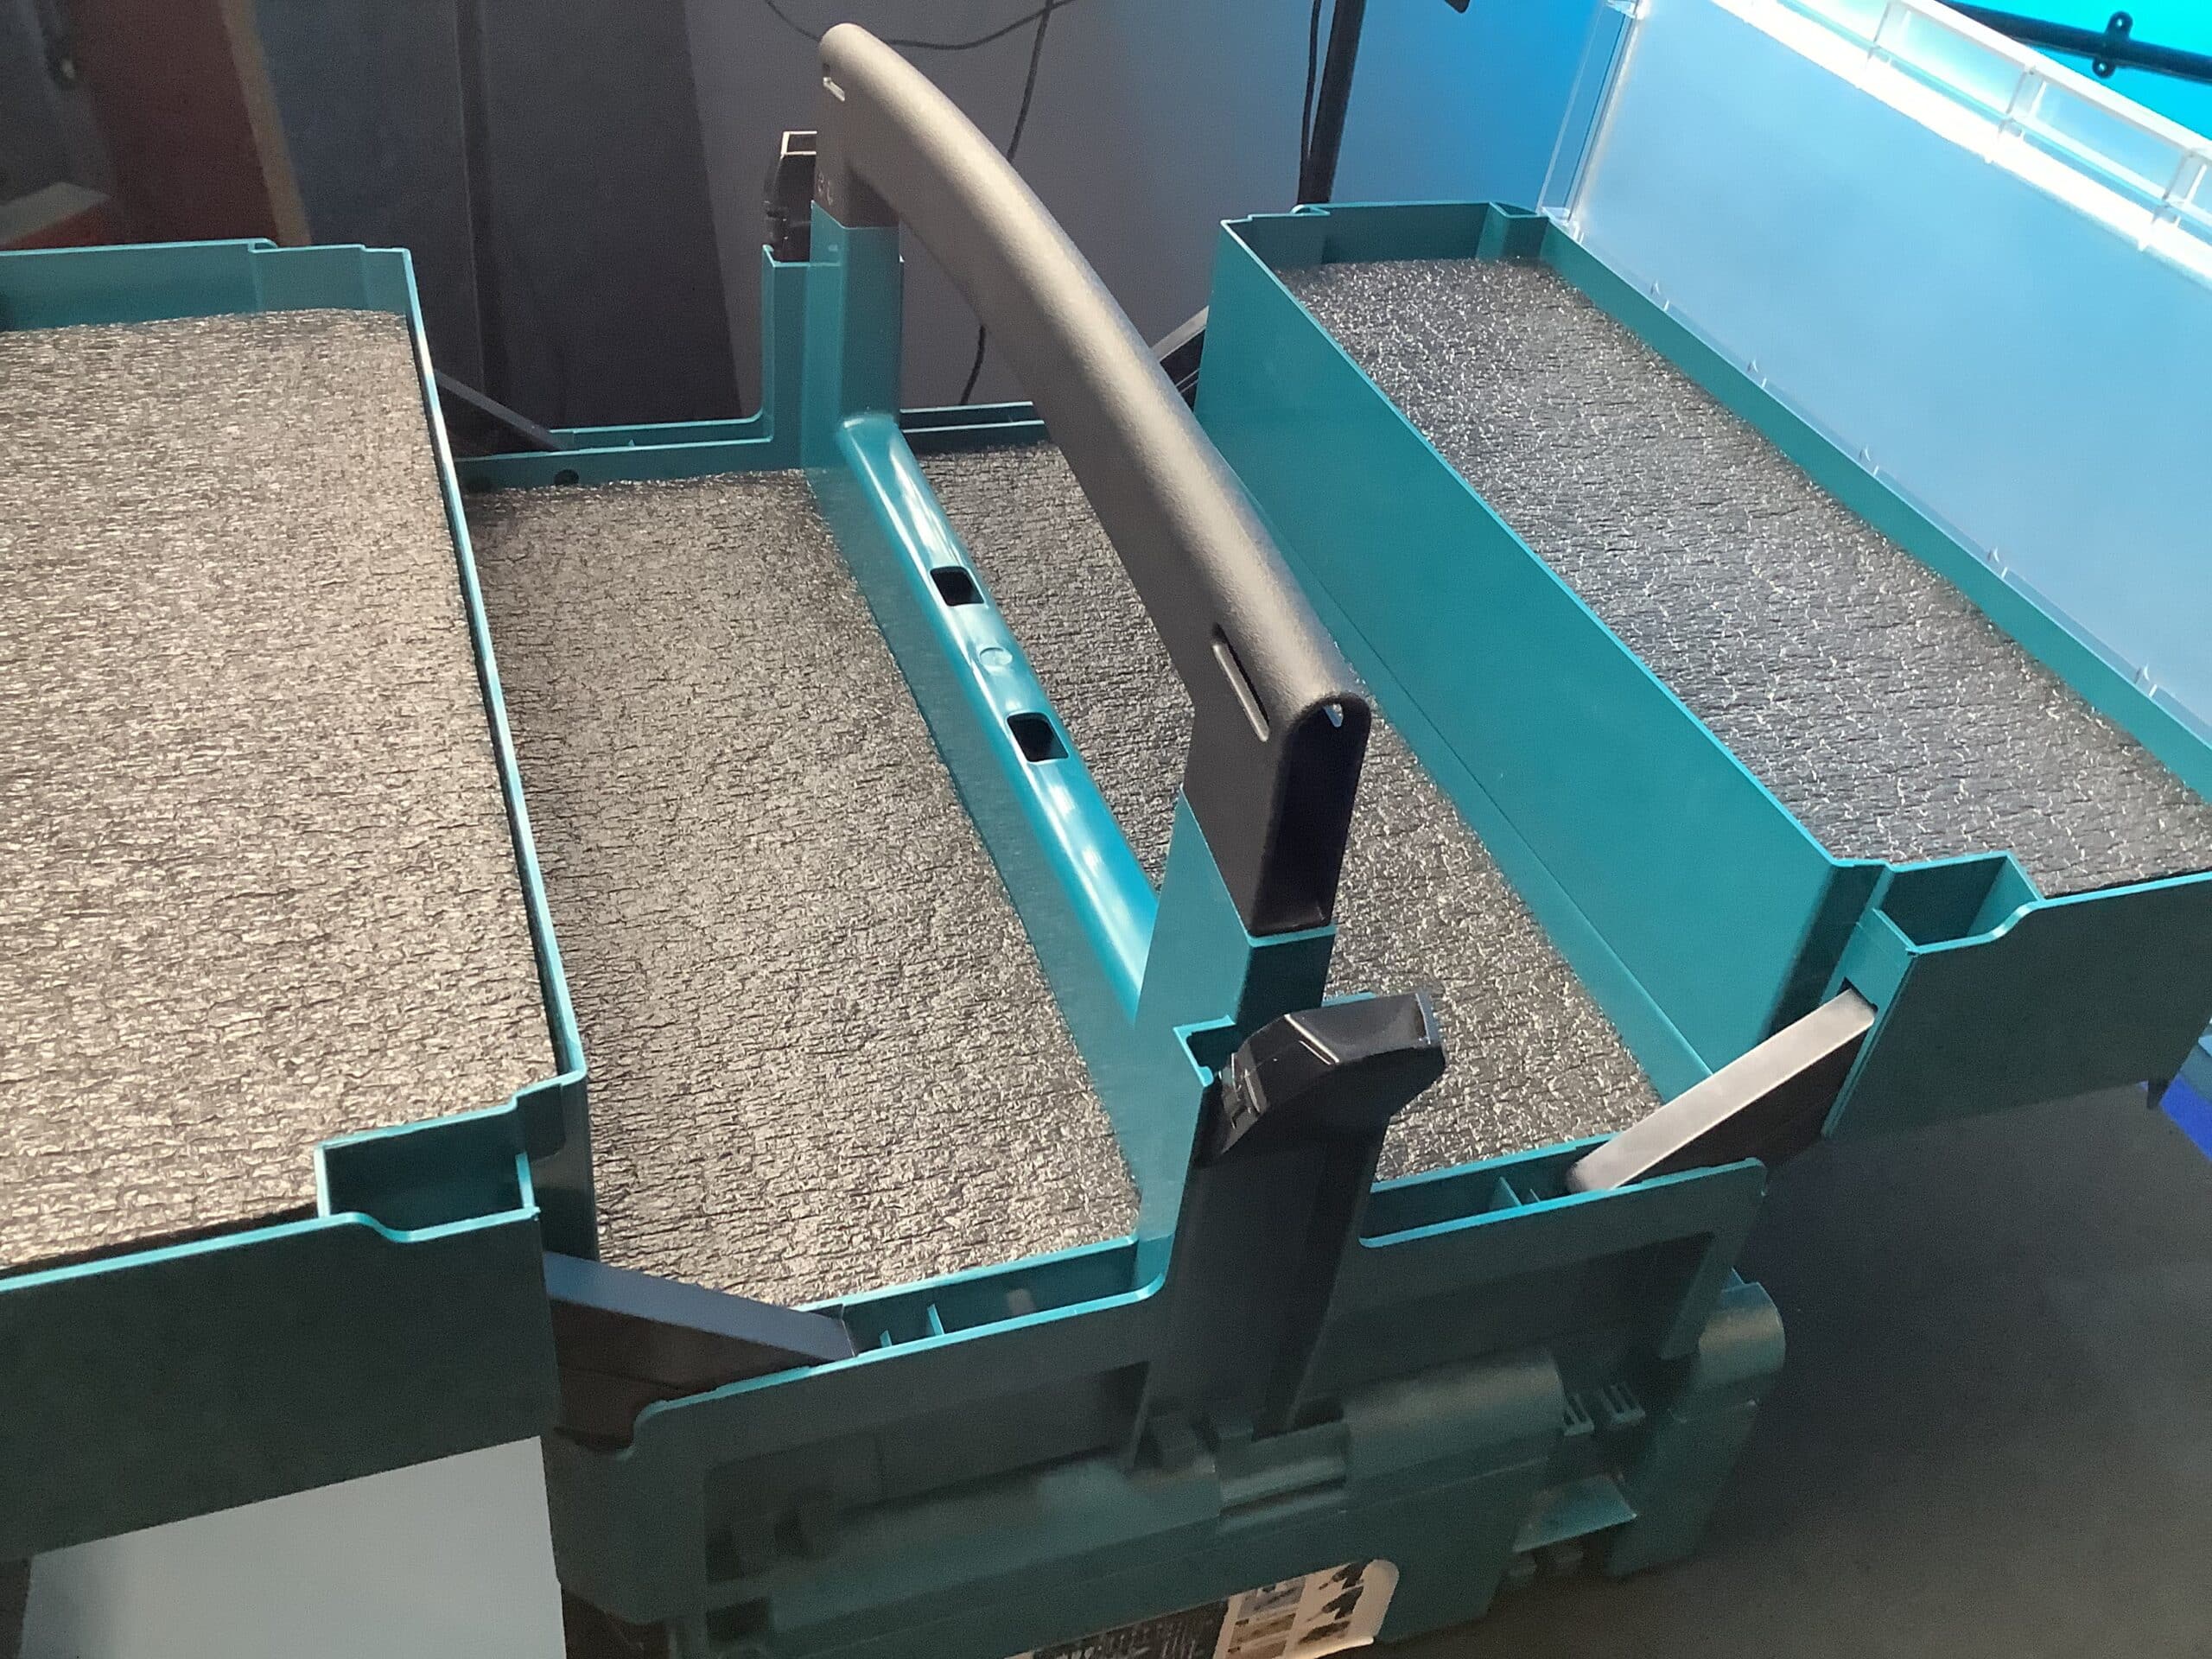
Again, we have these in seven different colours, and again they come in both 50mm and 30mm inserts. This cantilever toolbox attaches neatly on top of the Makpacs so it’s quite useful for your hand tools. Additionally, if you went for the 30mm Makpac inserts option, you have the ability to be able to stack layers. We supply these in twin packs so when you get your order, you’ll get enough to either do two boxes, or with the with 30mm you’d be able to have a double layer in one box.
What we end up with is a Makita Makpac organiser that’ much more durable. It will last us so much longer than the original blow molded trays. Better still, it’s efficient and tailored to the layout we want.

You might have also seen our Training an Apprentice video recently. In that, we created another Makita Makpac foam insert, so this is how a similar one would look like in red rather than the teal. It’s also worth highlighting that these liners are reversible. Here we’ve obviously cut through the black surface to reveal the red or teal underneath. But you can also flip it over cut on the back instead. That way you’ve got the bright colour on the face instead.

For more tips on Shadowfoaming, you can also check out any of the videos on our YouTube channel. Enjoy!
{"one"=>"Select 2 or 3 items to compare", "other"=>"{{ count }} of 3 items selected"}