Free UK Next Day Delivery*
Daily order cutoff at 2pm

Organising your toolbox might not be the most exhilarating activity for a Saturday afternoon, but trust me, it's a game-changer. Whether you're a car enthusiast, a professional mechanic, or somewhere in between, having a well-organised toolbox can save you time, prevent tool damage, and even make your workspace a bit safer.
So, let's dive into the expert steps to get your toolbox organised like a pro.
Ever tried finding a needle in a haystack? Well, trying to find your 10mm socket in a jumbled toolbox feels eerily similar, except it's less farmyard chic and more garage despair. An organised toolbox changes the game, not just when it comes to keeping your garage or workspace clean, but in actually enhancing your productivity when working on various projects.
Plus let's be honest, when your tools are disorganised, half the time you spend on your projects is actually just you rummaging through a chaotic toolbox, muttering words that would make a sailor blush.
It’s also worth noting that tools jostling around loose can lead to damage, and without efficient storage for your items, soon enough you’ll be back at the shops, handing over more of your hard-earned cash for replacements.
Put simply, a little time spent organising your toolbox means your tools stay in mint condition for longer. Plus, it's a lot easier to justify splurging on that high-end socket set when you know it won't end up looking like it's been through a demolition derby.
So, what’s the best way to organise a toolbox?
First things first, empty that toolbox. Lay out all your tools and give yourself a clear picture of what you're working with. This is the perfect time to reminisce about that lost 10mm socket or the screwdriver that’s seen better days.
Now that your tools are out, give your toolbox a good clean - dust and grime aren’t only unappealing, but they can also wear down your tools over time. As you clean, inspect your tools for any damage or wear - it’s better to find out now if something needs replacing or fixing.
With everything out and clean, it's time to declutter. Be ruthless. If you haven't used a tool in the last year, consider if it really needs to stay. This is also a great moment to donate duplicates or tools you never use to any DIY-enthusiast neighbour, friend, brother who’ll take them.
What you're aiming for is a collection of tools that are both essential and in good condition, so don’t hang onto an old rusty tool unless you actually use it.

Next up, you’re going to want to start sorting your tools by functionality. Group all your wrenches, screwdrivers, pliers, etc., together, as this’ll make it easier to find what you need when you're in the middle of a project.
I’m going to go over how to actually store your tools further down this blog, but for now, try to sort them into easy-to-navigate groups.
Within each functional group, you might also want to think about sorting your tools by size and shape; this can help in planning the layout of your toolbox, and ensuring that everything fits snugly while remaining easily accessible.
Finally, consider how often you use each tool. It’s simple: those you reach for the most regularly should be the most accessible. This simple step can significantly reduce frustration and increase efficiency in your workspace.
Now, onto my favourite part - storing your tools! While I do love a good tool wall, there are plenty of different ways you can organise your tool box to be just as efficient - from rolling organisers to drawer inserts.
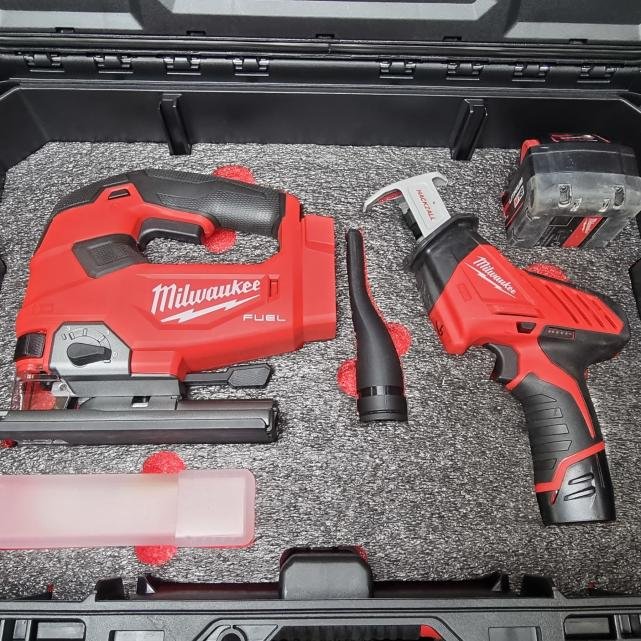
And of course, to really level up your organisation, consider using Shadow Foam toolbox foam organisers: these customisable inserts can be cut to fit each tool, so you can be sure they’ll stay in place and remain protected whether they’re in a drawer, on your tool wall, or even on your van rack.
And if you’re not sure what foam inserts are or where to begin, click through to have a look at my guide on how to use Shadow Foam, where I’ll break down what is how, how it’s used, and which depth of foam is best for your tool set. Yes I might be biased, but it’s truly a game-changer for keeping your tools in order and easily accessible.
Finally, another element to consider when organising your tool box is labelling or colour coordination. Personally, I prefer colour coding; our Shadow Foam inserts come in a range of different colours so that you can easily organise and store your tools according to frequency of use, room-specific tools, size, or whatever method works best for you.
And unlike labels (which, if written in pen or pencil, will fade over time) colour coding is the most durable - and arguably the easiest - way to keep your tool box organised.
Ultimately, an organised toolbox isn't just about making your garage look Instagram-worthy (although, let's not kid ourselves, we do love those likes). It's about stepping up your game, saving time, and making sure that you’re actually getting your money’s worth when you splurge on expensive tools.
With everything in its right place - and with the custom protection offered by Shadow Foam for each tool - you’ll be fully equipped to tackle any project that crosses your workbench.
{"one"=>"Select 2 or 3 items to compare", "other"=>"{{ count }} of 3 items selected"}